Lorena Uriarte

Quilts, cooking and craft

  • Home
  • Quilt Gallery
  • Classes and Workshops
  • Recipes
  • Shop
  • Lorena’s Blog
  • Contact Lorena
You are here: Home / Archives for admin

Quilt Coat Pattern Round Up!

19 June, 2024 by admin Leave a Comment

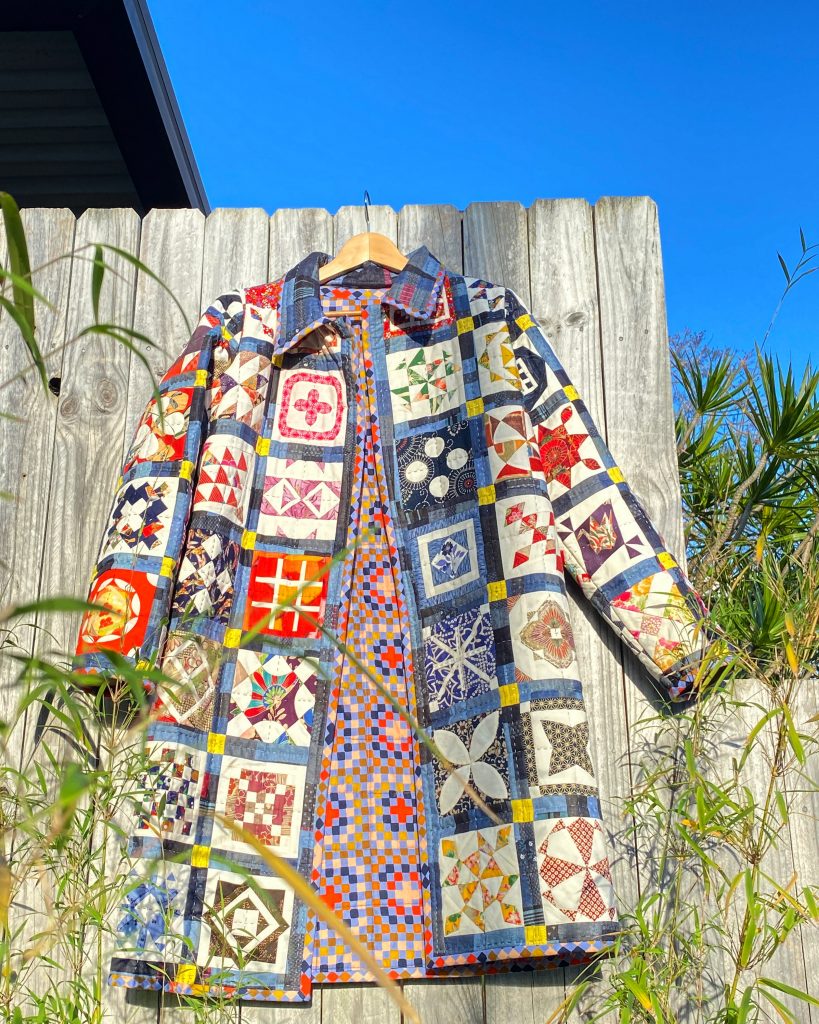
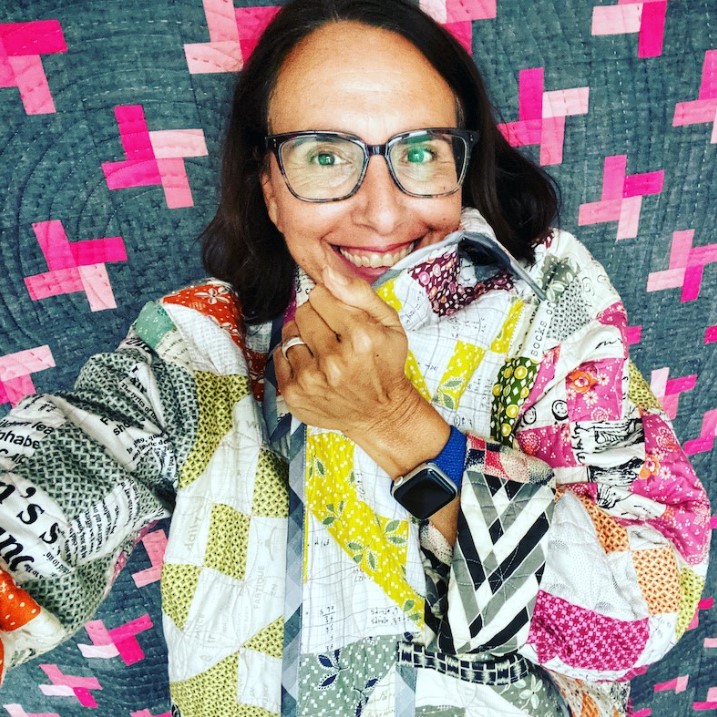
Which is my favourite quilt coat pattern?

It’s not surprising that I have embraced the quilt coat trend. I love making quilts, sewing my own clothes, and I hate being cold. And because I can’t disappear off to Spain every winter, a quilt coat is the next best thing!

Here are three of my favourite quilt coat patterns, along with a comparison of their hoods and some notes on binding:

Cheeky Lorena wrapped in a quilt coat
  1. The Tamarack by Grainline Studios
    • Pros: This pattern has a good range of sizes and features a flattering shape due to its scooped hemline around the hips. The longer back piece provides extra coverage, and you have the option for welted or patch pockets, as well as no collar, collar, or hood options.
    • Cons: The pattern was originally written for non quilted fabric, which can make it confusing, especially when dealing with darts and welted pockets. Additionally, the Hood, Collar & Patch Pockets Variation comes at an extra cost.
    • Hood: My favourite hood of the three. It’s a good shape and easy to bind.
Lorena's Tamarack
Tamarack
Chore Coat
Kaleidoscope Elemental Coat
Elemental
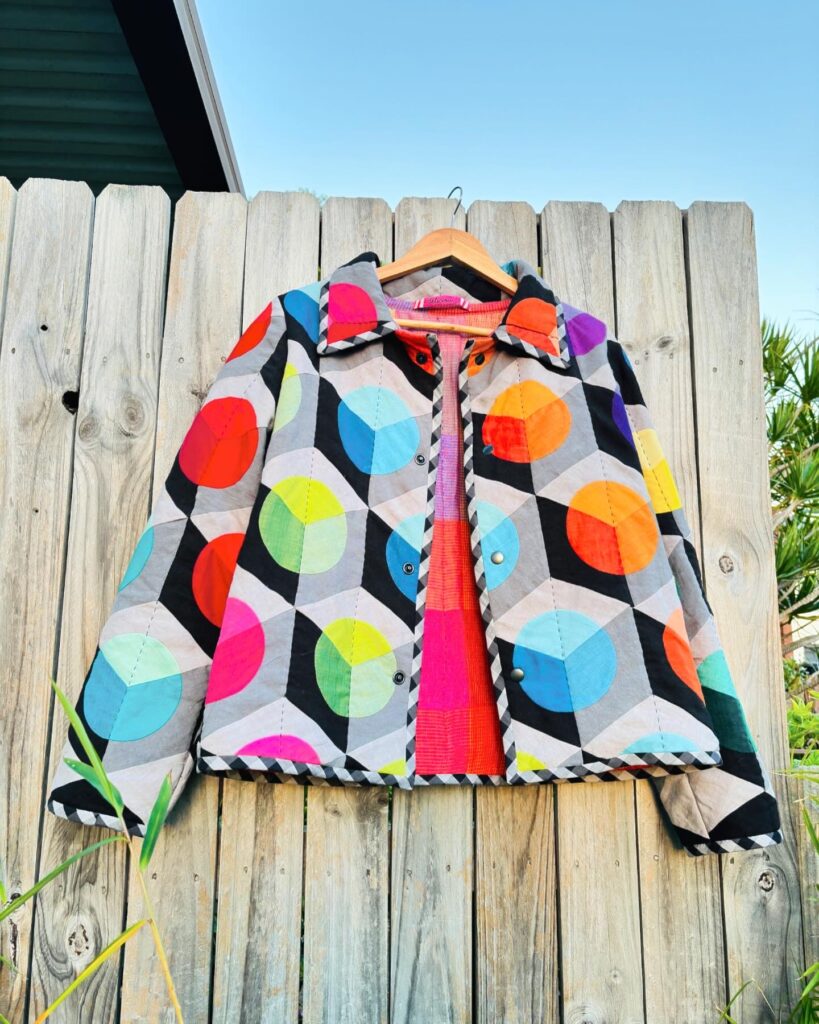
  1. The Chore Coat by Patchwork & Poodles
    • Pros: Designed specifically for quilted panels or to repurpose an existing quilt, this pattern has a slimmer fit and a sporty straight hemline at the hip. It includes the hood, collar, and pocket patterns in the initial cost. The pattern is simply written and easy to follow. I like the method for inserting the sleeve. It is straightforward to adjust the length of this coat.
    • Cons: Since it is a slim fit, you may want to make a toile (a test garment) to ensure the fit is perfect for you. It may not suit all sizes. 
    • Hood: My least favourite hood. I find it a bit bulky. I prefer the collared version.

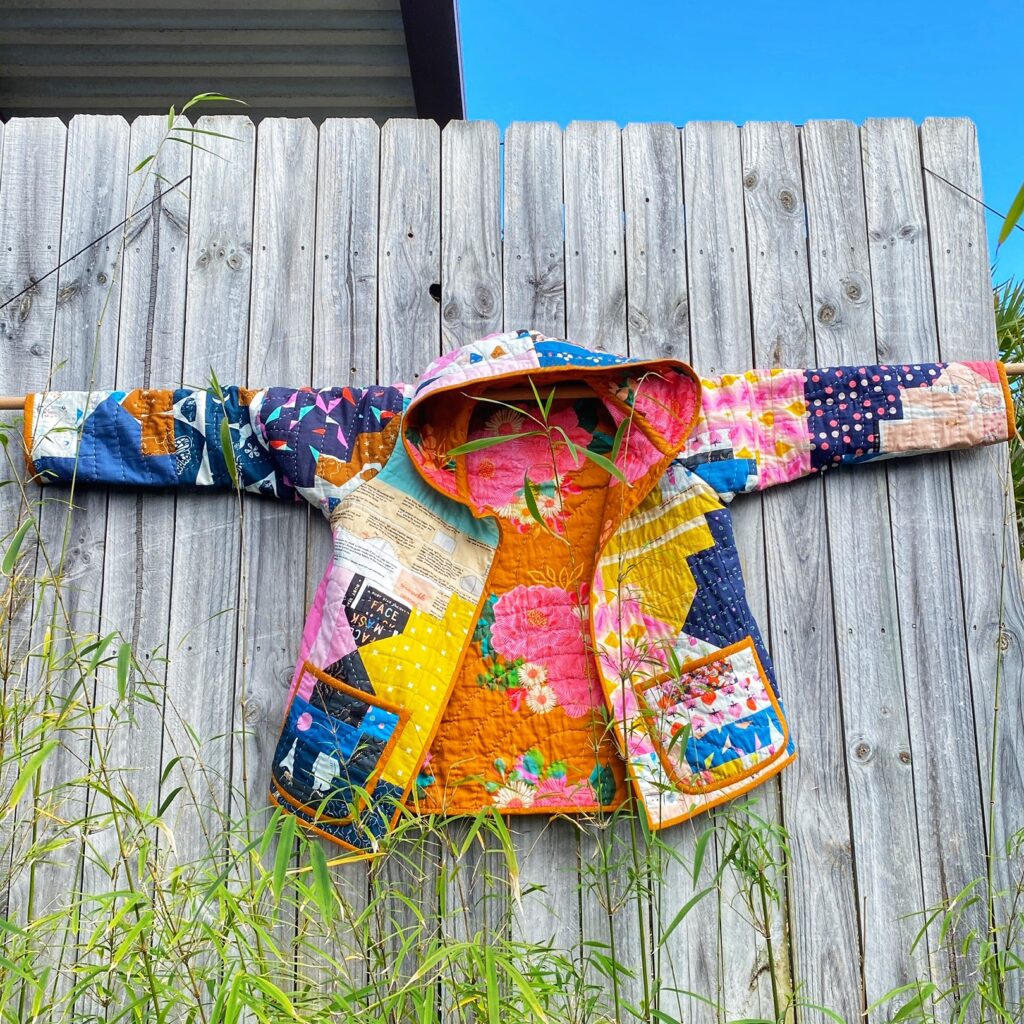
  1. The Elemental Coat by Crinkle Dreams
    • Pros: This pattern offers lots of variations, including a cropped jacket, a hip-skimming length, and a longer knee-length version. There are also two sleeve lengths. Like the Chore Coat, you can choose a design with or without a collar or a hood, all included in the original pattern purchase. Plus, it features in-seam pockets, which we’ve all been waiting for in a quilt coat pattern.
    • Cons: I generally am not a fan of dropped shoulder designs as the coat can feel a little bulky, but I know others appreciate the extra room. The coat is designed with a one-button closing, but I chose to size up and add buttons down the front.
    • Hood: I also like this hood. It sits well around the neck and is easy to bind.
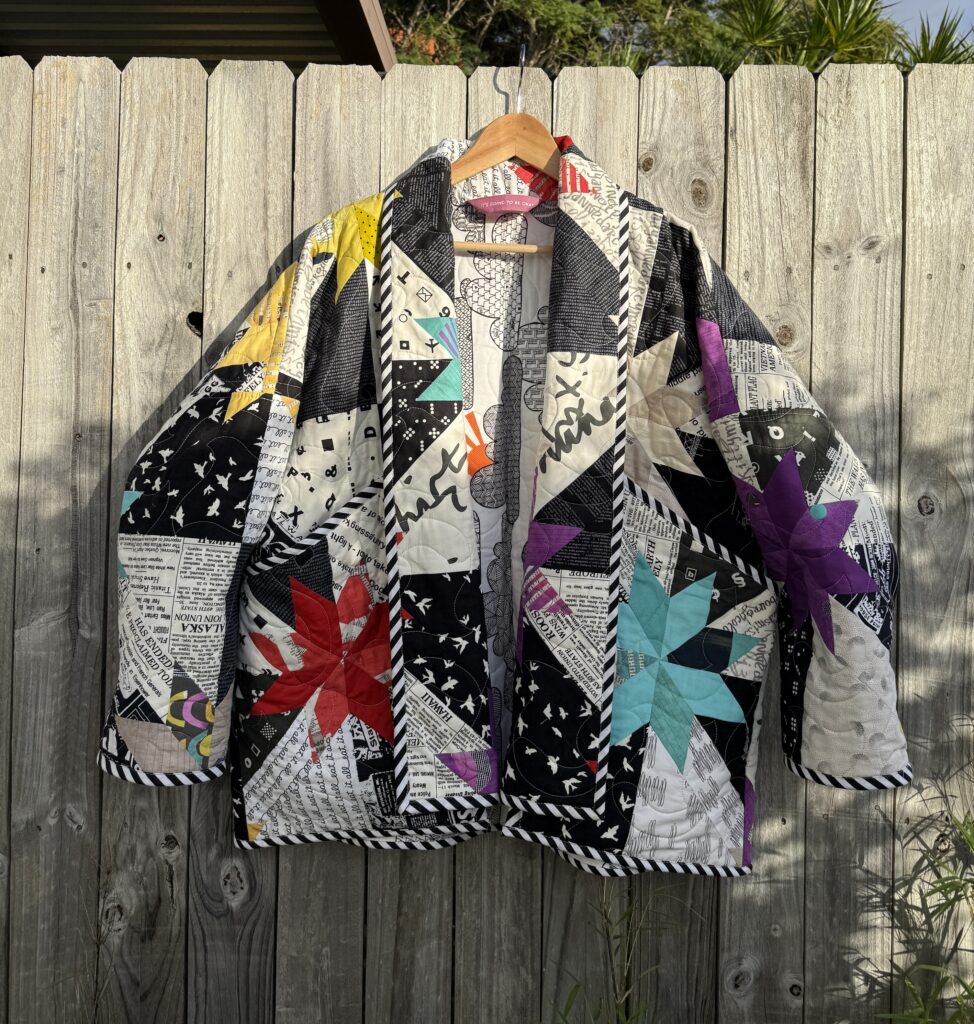
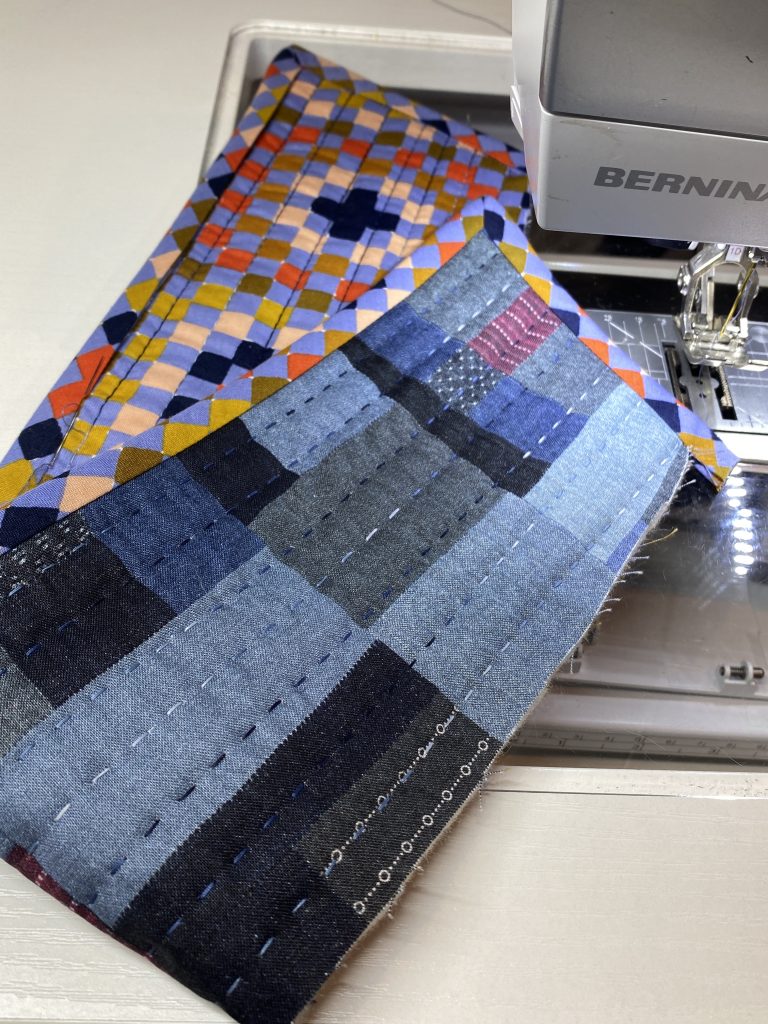
Making a Reversible Coat

Any coat can be made reversible with careful attention to binding the internal seams. This is my preference for any coat, as I dislike raw internal seams; unbound wadding leaves fluff on your clothes. However, I haven’t been able to master a reversible coat with double sided in-seam pockets, yet! Stay tuned…
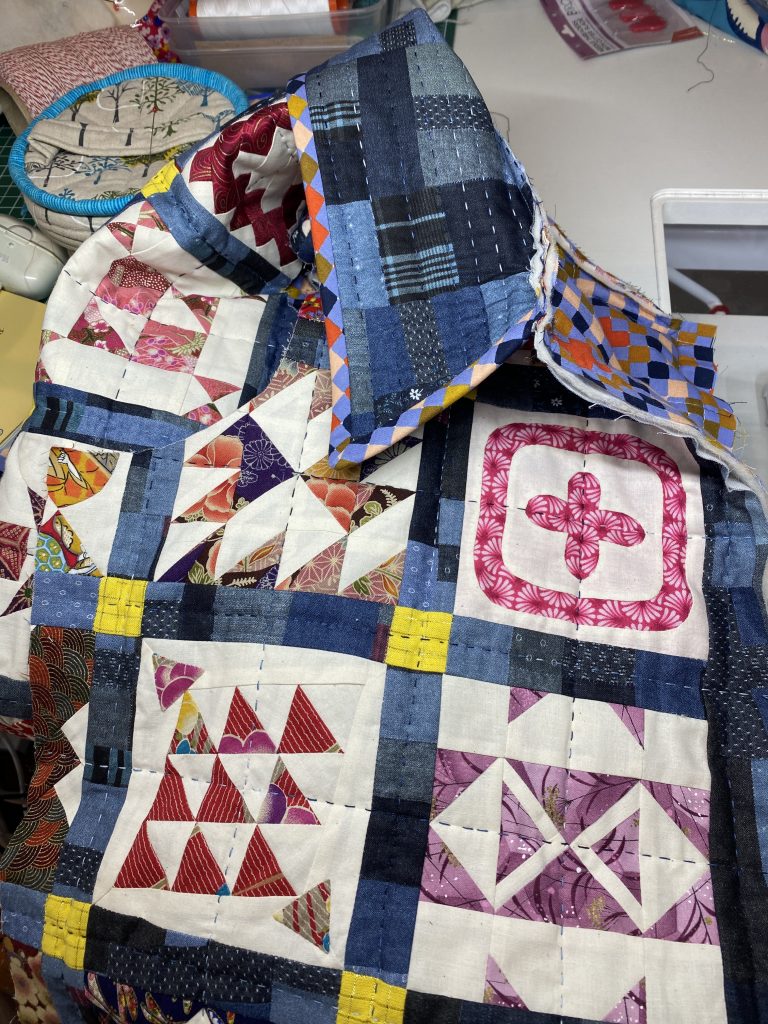
Binding

I’m not afraid of a hand-finished binding; I think it’s worth the effort. I make my own by cutting 2″ bias strips and feeding them through the Simplicity bias tape maker. I’ve also used pre-made bias tape, stocking up at quilt shops that have a cute selection. There is a lot of binding required to bind a coat once you take into account the outside edges, sleeve cuffs, collar/ hood, and internal sleeve and side seams. It can be up to 8 meters depending on the pattern and size. Hate binding, most quilt coat patterns provide alternate finishing methods, like overlocking and Hong Kong seams.

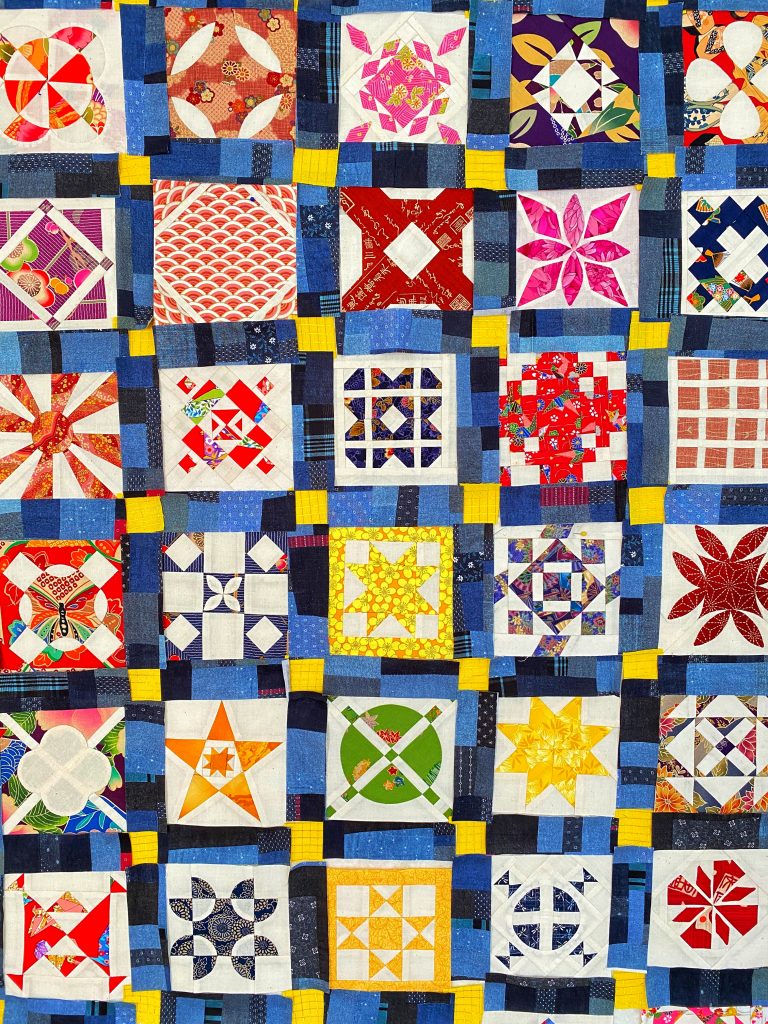
Quilting Tips for Making a Coat

If you are making a quilt from scratch, think about how you want your finished coat to look and feel. Not just the patchwork but also the wadding and density of quilting:

  • Wadding: Cotton and bamboo wadding that has been lightly quilted and washed and dried has a better drape. Hand quilting with a wool/poly wadding gives a coat a puffy look.
  • Warmth: The warmth of your coat can vary based on the amount of patchwork, the type of wadding and the density of the quilting.
  • Lining/Backing Fabric: Choose smooth fabrics for the lining. They are softer on the skin and drape better.

Whether you’re looking for a project to keep you warm or a stylish way to showcase your quilting talents, these patterns and tips offer something for everyone. Happy sewing!

I teach a Two Day Quilt Coat Workshop. Find a list of them by searching my class schedule.

  • 2025 Quilt Coat Workshop Dates
  • 📍 10-12 April
  • Australasian Quilt Convention
  • Royal Exhibition Building (Melbourne)
  • 📍 2-3 May
  • Gilgandra, NSW
  • (private guild event)
  • 📍 23-24 May
  • Precious Time Fabric & Quilts 
  • Toowoomba, Queensland
  • 📍 31 May – 1 June
  • My Sewing Supplies (Lindfield)
  • 📍 7-8 June
  • Treehouse Textiles
  • Mornington, VIC
  • 📍 5-6 July
  • My Sewing Supplies (Sylvania)
  • 📍 26-27 July – 
  • Thorpe & Co
  • Boolaroo, NSW
  • 📍 27-28 September  
  • w/ Karen Lewis Textiles
  • West Yorkshire, UK
  • 📍 4-5 October  
  • Lady Sew & Sew
  • Oxfordshire, UK

Filed Under: Uncategorized Tagged With: Classes, patchwork & quilting, Quilt Classes, Quilt Coat, quilt coat class

Protected: Kawandi Step Through Images – STUDENTS ONLY

9 April, 2024 by admin Leave a Comment

This content is password protected. To view it please enter your password below:

Filed Under: Uncategorized

Quilt Coats

26 October, 2022 by admin 1 Comment

The Before Times Exhibition: Wangaratta Art Gallery
12 Nov – 18 Dec 2022

I’m excited to have three of my bespoke quilt coats included in a new exhibition opening at the Wangaratta Art Gallery on 12th November.

THE BEFORE TIMES
A group exhibition featuring Phong Chi Lai, Tara Glastonbury, Caroline Hadley, Diana Vandeyar, Jessica Wheelahan and Lorena Uriarte.

The term before times dates back centuries and has a long association with imagined worlds and apocalyptic stories. Recently, the before times has taken on new significance as our lives changed dramatically and we fondly remember times before Covid-19.

Six artists have used this phrase as a starting point, some taking their practices back to basics or celebrating the return of inspiration and materials while others explore types of memory or envisage a dystopian future that might await us.

Nothing Is Sacred – Quilt Coat made with Dear Jane quilt

Number 1

Blue Monday – Quilt Coat made with face mask scraps

Number 2

Face Mask Jacket – Quilt Coat made with commercial face mask panels

Number 3

Filed Under: Uncategorized

Bushfire Charity Block drive for Wollongong MQG

7 January, 2020 by admin 1 Comment

Please see this post at Wollongong MQG Facebook group for more details.

I was asked to design an original block to share as inspiration. Please find the instructions below. This block is free for anyone to use for charity blocks and quilts. Please do the right thing 🙂

“How you can help:
We have decided to make tree blocks. The tree is a symbol of growth and nourishment. A tree symbolizes the generations of a family; a tree sprouts from a seed, the roots provide strength and stability, and whilst the new sapling is young and vulnerable they are protected by the other trees until they grow and flourish. In time the branches spread and then create new fruit that gives life to the next generation.

There is no restriction to one type of tree block. We would love our quilts to be beautiful and diverse just like our wonderful communities. The below quilt blocks have been designed and supplied for inspiration, but please feel free to use your own ideas and colours. If you would like to help, please make a tree block of a generous 12.5 inch square using a low volume / white or pale grey background. Once completed please send to:

Wollongong Modern Quilt Guild
PO Box 54
Jamberoo NSW 2533

We are going to distribute the quilts made to the families who have lost everything. 

We would like to ask that blocks be mailed for arrival by the end of February. We thank you in advance for your support. #bushfireblocks

If you are going to be at Quiltcon, I’d be happy to collect your block there. Please get in touch to arrange a pick up. Thank you.

New Shoots Quilt Block – Lorena Uriarte
New Shoots Bushfire Charity Block InstructionsDownload
New Shoots Leaf TemplateDownload

Filed Under: Uncategorized

Shepherdless Pie

5 June, 2018 by admin Leave a Comment

Print
Shepherdless Pie
Auth: Lorena
Recipe type: Vegetarian
Prep time:  40 mins
Cook time:  30 mins
Total time:  1 hour 10 mins
Serves: 8
 
A vegetarian version of the perennial family favourite! Save lots of time by chopping all the vegetables in your food processor. Cook lentils from scratch for better flavour. Tinned lentils are ok at a pinch.
Ingredients
  • 4 cups cooked lentils
  • ¼ cup Olive Oil
  • 2 Onions, chopped
  • 3 Garlic cloves, crushed
  • 2 Carrots, grated
  • 1 Capsicum, finely chopped
  • 2 Celery sticks, finely chopped
  • 2 Zucchini, grated
  • 400gm Pumpkin grated (optional)
  • 2 Bay leaves
  • 2 tablespoons Oregano/ mixed herbs
  • 1 tin Tomatoes, pureed
  • 4 tablespoons Tomato puree
  • Salt & Pepper to taste
  • 6 Potatoes, peeled, boiled in salted water and mashed
  • Butter + milk for mashed potatoes (optional)
Instructions
  1. Drain the lentils well.
  2. Gently fry the onion, garlic, carrot, celery and capsicum in olive oil till softened.
  3. Add the herbs, zucchini and pumpkin; cook a further 5 mins.
  4. Add the tinned tomatoes, tomato puree and stir through.
  5. Add drained lentils and simmer for 20 minutes.
  6. Season well and spoon into oven dish.
  7. Top with an even layer of mashed potato.
  8. Bake at 180C for 30mins till top is golden.
3.2.2929

shepherdless

Filed Under: Comfort Foods, Everyday Meals, Recipes, Vegetarian Dishes

Orange & Almond Brownie Recipe

7 November, 2017 by admin 4 Comments

Orange and Almond Brownie

Print
Orange & Almond Brownie Recipe
Auth: Lorena
Recipe type: Dessert
Prep time:  10 mins
Cook time:  30 mins
Total time:  40 mins
Serves: 16
 
So easy, it almost feels like cheating! Actually, I'm pretty sure it is cheating. Use Aldi's Moser Roth Orange & Almond Chocolate and you can't go wrong. Or some other good quality dark chocolate... but you get a lot of bang for your buck with the Aldi stuff!
Ingredients
  • 125g unsalted butter, chopped
  • 125g orange and almond dark chocolate, chopped
  • 3 eggs, lightly whisked
  • 335g (1½ cups) white sugar
  • 115g (3/4 cup) plain flour
  • 30g (1/4 cup) Dutch cocoa powder
  • 1 teaspoon vanilla extract
  • Pinch of salt
  • 1 tablespoon sliced almonds
Instructions
  1. Place butter and chocolate in a small pot, slowly stir and melt over a low heat.
  2. Set aside to cool whilst you prepare the rest of the ingredients.
  3. Quickly whisk eggs, sugar and vanilla extract together.
  4. Add the egg and sugar mixture to the cooled melted butter and chocolate.
  5. Continue to mix whilst adding the flour and cocoa till just combined.
  6. Don't over mix once the flour is in.
  7. Pour into a prepared 20cm brownie tin, buttered and lined with silicon paper.
  8. Sprinkle with sliced almonds to garnish.
  9. Bake at 180C for 30 minutes. Centre should be cooked but moist, edges should be crisp. Nuts should be lightly browned. If they start to burn cover the brownie with foil to continue cooking.
  10. Cool completely in the tin.
  11. Lift out silicon paper to slice into 16 pieces.
  12. Best made the day before you need them 🙂
3.2.2929

Orange and Almond Brownie

Filed Under: Comfort Foods, Cookies, Desserts, Recipes, Treats

Juggling: my Splendid Sampler block!

8 January, 2017 by admin 43 Comments

Hi there! It’s been a while, I had the best intentions to do a lot more blogging in 2016. Oops. If you have a poke around you’ll see I’m not very good at the writing and documenting part of my creative life. Thanks for visiting me over here in the middle of a warm and sunny Sydney summer. Hope you are having a splendid day!

I assume some of you are here for tips on making Block 90 on The Splendid Sampler adventure. What a wonderful project Pat and Jane have put together, and can you believe we’re just 10 blocks shy of completing? I’ve been making some of the blocks along the way and now that I have a plan for sashing I’m more excited than ever to get cracking with it. I’ve made lots of sampler quilts, I really love them because there’s always something new and those little blocks are fun to make.

I'm setting my Splendid Sampler blocks with a jaunty & spiky sashing.

I’m setting my Splendid Sampler blocks with a jaunty & spiky sashing.

So, back to my little block… I’ve used some of my favourite techniques – applique circles, bias tape applique and wonky crosses. I love layering different techniques in a little block. But it can be a little daunting if you’ve never done something like this before. Working at a small scale also means I need to pay extra attention to extra bulk and staying inside the seam allowance.

As you read the pattern instructions you’ll see there are a few stages. I recommend you chunk it down to manageable parts if its the first time you try one of the techniques. Actually, even if you’re confident, take time to enjoy the process with a couple of cups of tea or a walk around the block…

choose fabric

Firstly, choose all your fabrics and gather your supplies. My suggested fabric quantities are generous so you can trim back your block. You’ll also see I use a metal 1/8″ bias tape maker. It came in a set which I bought online from California, I so wish I could get these easily locally. You may be lucky enough to have them at your local quilt store. But if not, you can carefully cut a strip of Mylar plastic. The metal bias bars get very hot and help form a nice crease, please be careful if you are using one.

I prefer using a metal bias bar and having a closed loop rather than an open bias tape because it is sturdier and I can manipulate it without worrying it will fray and lose the creases. It also stores nicely around a spool or wooden dowelling even in the most humid Sydney weather.

So grab your supplies and lets get started!

Prepare your 3 bias tape loops first. Cut your strips from an 8″ square of fabric. 3/4″ wide strips cut on the diagonal from the square.

cut bias strips

Press strips in half. Wrong sides together, be gentle not to stretch them.

press bias in half

Place bias bar inside the fold and mark where your seam should go. Don’t make it too snug or you won’t be able to slide the bar in and out. I use a generous 1/8″ seam.

stitch with correct seam allowance

Once you have stitched the strip and you are sure you can move the bias bar in and out, trim back the seam allowance to reduce bulk.

trim back seam

We’re nearly there… twist seam to the back and press it down. Remove the bias bar. Repeat for the two other bias tape strips.

press back seam

Wind them around your finger or a pencil to get them to curl a little. This will help you get nice tight loops to applique.

twist around your finger

Make sure you’ve got all your fabric pieces ready to proceed. Background, squares for circles and strips to insert.

bias tape ready

Trace the pattern lightly on to your background square. Trace the outside of the circles and one side of each loop. You will use this as a guide to place your applique. Make sure you leave plenty of room around the outside to centre your block. I also mark the corner points to help with trimming the block later.

trace pattern on background

Using little dots of applique glue, place your loops down on your background fabric. You can also use tiny applique pins or baste them down with thread.

applique glue

Using a colour that camouflages with your applique loop, stitch it down firmly. See the tails of the loops? They will be hidden behind the appliquéd circles. Trim them on the diagonal to make them less bulky.

applique loops

Now it’s time to prepare your juggling balls. This is a two step process. First we make the wonky crosses, then we trim them back to a circle to applique down.

Start with one of the square pieces of fabric and cut it randomly in half. Select which fabric strip you will be inserting.

cut square in half

Sew the strip to one half. Then stitch the other half of the square to it. Always using a 1/4″ seam allowance.

piece in strip

Cut this randomly across the strip you just set in. Choose your next fabric strip.
cut in half again

Stitch one side on first. Sewing the second side is a little trickier. You need to try to align the two sides, which is difficult with that pesky angled seam allowance in the way. I visually line it up as much as possible then fold over the seam allowance to check it. Sliding it up and down till its as good as I can get it.

fold over seam allowance to help align

Because I’m extra cautious I still don’t stitch the whole seam, I just sew the crucial middle of the seam bit first, flip it over and check it before stitching the whole lot. This may seam tedious but it’s not as tedious as having to unpick the whole thing!

stitch centre to check

Flipping over to the back of your wonky cross, trim or grade that top seam allowance. Usually we can press seams open to reduce bulky seams but the open seams stretch too much for these small circles.

grade seams

Grab your circle template and trace around it with a pencil. Check out those graded seams…

trace circle

Trim back your circle to a generous 1/4″ – 1/2″ seam allowance and stitch a running stitch around. Pull on the end of the threads to gather the circle around your template. Don’t cut your threads yet!

gather circle

To get a nice smooth circle ready to applique down I run some starch around the outside edge of the circle with a brush. Or you can put a little pressing liquid in a dish and roll the edge around quickly. Press the circle with a warm iron, be careful not to melt your plastic template!

starch edges

You can wrap a piece of foil around it if you like, that helps protect the plastic and holds the heat for longer to get a crisp edge.

wrap with foil

Repeat that for the two remaining circles and applique them down into place. Choose fine thread that disappears when you place it over your applique shape.

applique circles

When you are finished with all the applique, give it a light press and trim your block down to 6.5″.

trim block

And that’s another block done and ready to join the others! I hope you’ve learnt something new. We all have our favourite techniques and I know fiddly work isn’t for every one. You may want to skip making the bias tape loops and just applique ribbon or use embroidery to create the loops. And instead of those wonky juggling balls you can fussy cut some fun fabric circles…

Whatever you do, thank you for joining me for The Splendid Sampler. I look forward to seeing all your lovely blocks. And I’m eagerly awaiting The Splendid Sampler book that Pat and Jane are publishing with all the patterns so I can continue making more of these great blocks. It’ll be a lovely record of this fun project.

Here’s a photo of my original block that will appear in the book. In fact, I think it’s even on the cover. I can’t wait to see my block together with all the other Designer blocks!

juggling

I’m more of an Instagram girl these days, feel free to tag me if you have any questions. You can find me over there as lorena_in_syd. I know, sew original!

Happy stitching!

Lorena x

Filed Under: Lorena's patterns, The Splendid Sampler, Tutorials Tagged With: 6" Blocks, applique, bias tape applique, Sampler Quilt, techniques, The Splendid Sampler

Sydney MQG: Sunday Sewalong

24 March, 2016 by admin Leave a Comment

for more information about Sydney Modern Quilt Guild meetings:


MEETINGS

Filed Under: Sydney MQG Tagged With: Sydney MQG

The Splendid Sampler

2 February, 2016 by admin Leave a Comment

It’s no secret that I love a sampler quilt, in fact I think I may be a tiny bit addicted to little blocks that let me play with fabric in small chunks of time. If you also love projects that keep changing and surprise you with different techniques and fabric possibilities you may want to join The Splendid Sampler Sew Along.

splendid_button_4

This brilliant year long project is the brain child of two very talented designers, Jane Davidson and Pat Sloan. They’ve collaborated with over 80 exciting designers to bring you one hundred 6″ patterns over the course of a year. Patterns will be released every three or four days, allowing for holidays.

There’s a bunch of other big names in this collaboration, a handful of Aussies I love like Cat Demack, Jen Kingwell and Siobhan Rogers. Some long time favourite international designers like Kerry Green, Latifah Saafir and Victoria Findlay Wolfe. Actually, choosing just three to mention was hard, you need to check out the whole list!

And then there’s me. Hahaha, I’m certainly feeling like I’m punching above my weight with this and I’m intending to sew along and learn new stuff from all the other designers. And I’ll have to put more effort into this blogging caper… but it’s more likely that you’ll find me over in The Splendid Sampler Facebook Group (Currently 8,000+ members) or posting my progress on Instagram. Check out #TheSplendidSampler hashtag to see what everyone else is doing.

It all kicks off this Valentines Day (14th February) perfect to demonstrate the huge love that Pat & Jane have poured into this adventure. So what are you waiting for? Sign up is free over HERE!


Filed Under: Front page Tagged With: Collaboration, Community, Sampler Quilt, Sew Along, The Splendid Sampler

They called it “Diet Pie”…

18 October, 2015 by admin Leave a Comment

Print
Diet Pie
Auth: Lorena
Recipe type: Dessert
Prep time:  15 mins
Cook time:  40 mins
Total time:  55 mins
Serves: 8
 
So named at quilt class, cause there are no calories whilst stitching, right?
Ingredients
  • 3 medium granny smith apples, peeled, cored and cubed
  • 2 tablespoons water
  • ½ lemon, juiced
  • 2 tablespoons sugar
  • 2 tablespoons currants
  • 1 teaspoon cinnamon, ground
  • ¼ teaspoon cloves, ground
  • 2 tablespoons walnuts, chopped
  • 1 teaspoon plain flour
  • 2 sheets puff pastry
  • egg and milk wash
Instructions
  1. Simmer apple, water, lemon juice, sugar and currants for 5 minutes till apples are tender but still hold their shape. Watch they don't burn! Add a tablespoon of water if that looks likely!
  2. Remove from heat and stir in cinnamon, cloves, walnuts and flour.
  3. Cool completely.
  4. Cut pre-rolled pastry into two large circles. Use the biggest plate or bowl you can and a sharp knife.
  5. Place one circle on a sheet of baking paper on a flat baking tray.
  6. Top with apple filling, keeping 1" clear around the edge and press it level.
  7. Place the other circle on top and press the edges together till sealed.
  8. Using a small bowl, trace a faint circle in the centre.
  9. Then with a sharp knife cut out from the circle forming 16 slices.
  10. At this point you may need to chill the pastry again if it's a bit floppy before proceeding, place baking paper with tart/ pie on a plate into the fridge or freezer to firm up the pastry a bit. When cooled slide paper back onto baking tray
  11. Next, turn each slice on its side to expose the filling.
  12. Brush lightly with beaten egg and milk.
  13. Bake at 200C for 30 minutes till golden and puffed, if browning too quickly you may need to turn down your oven a bit.
  14. Allow to cool on a rack before serving.
3.2.2929
They called it Diet Pie...

They called it Diet Pie…

Diet Pie

Filed Under: Desserts, Recipes, Treats, Uncategorized Tagged With: apple pie, easy recipe, puff pastry

  • 1
  • 2
  • 3
  • …
  • 5
  • Next Page »
  • Email
  • Facebook
  • Flickr
  • Instagram
  • RSS

Lorena Uriarte

Lorena Uriarte

Subscribe to My Newsletter

GET MORE UPDATES!

Sign up to get exclusive updates & tips!

Check your inbox or spam folder to confirm your subscription.

MQG Member

I’m a member of the MQG!

The Splendid Sampler

The Splendid Sampler

Categories

  • 12 inch sampler
  • Bee Blocks
  • Chuck Nohara
  • Comfort Foods
  • Cookies
  • Desserts
  • English paper piecing
  • Everyday Meals
  • Foundation Paper Piecing
  • Front page
  • Fussy Cutting
  • Lorena Uriarte
  • Lorena's patterns
  • Quilts
  • Recipes
  • Red & White
  • Sydney MQG
  • The Splendid Sampler
  • Treats
  • Tutorials
  • Uncategorized
  • Vegetarian Dishes
  • Workshops

Upcoming Events

May 23
May 23 - May 24

Precious Time Fabric & Quilts : Toowoomba (QLD)

May 31
May 31 - June 1

2 Day Quilt Coat Workshop : My Sewing Supplies (Lindfield)

Jun 7
June 7 @ 10:00 am - June 8 @ 3:30 pm

Quilt Coat Workshop @ Treehouse Textiles ; Mornington (VIC)

Jun 14
10:00 am - 3:00 pm Event Series

2nd Saturday Class: 60 Stitches (Warriewood)

Jun 18
10:00 am Event Series

3rd Wednesday Class – My Sewing Supplies (Sylvania)

View Calendar
  • Facebook
  • Instagram
  • Pinterest
  • RSS
  • Twitter
  • Shop
  • Shipping and returns

c. 2015 Lorena Uriarte

Copyright © 2025 · Foodie Pro Theme by Shay Bocks · Built on the Genesis Framework · Powered by WordPress